Why??
Is there a conspiracy to keep people away from kaya? Hmm, I hope not.
But no worries, I’m here to tell you all about this incredible spread.
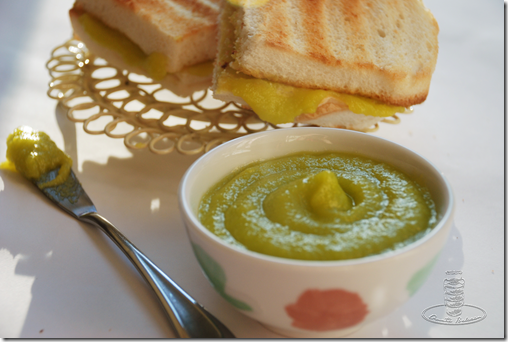
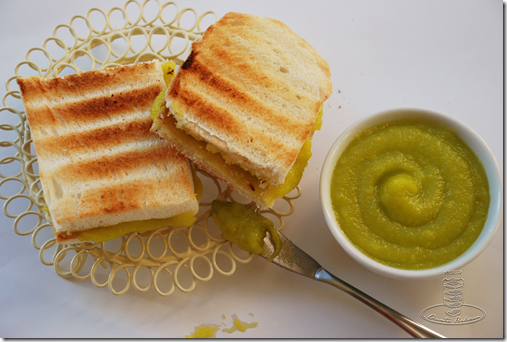
Kaya is a curd-like jam made from slow-cooking coconut milk, eggs and sugar. Pandan leaves are often added for colour and flavour.
It is a sweet, thick custard that tastes like caramelized coconut, and depending on the type of egg, flavouring and food colouring used, kaya can be either green, brown or orange.
In Singapore, kaya is most commonly eaten on toast and yes, by the spoonful straight from the jar (it’s really hard to resist, trust me). It’s fabulous on waffles and pancakes too.
Although I’ve loved and eaten kaya all my life, I’ve never attempted to make my own because I’ve often heard about how difficult it is.
“You’d have to stir it till your arm falls off” and “you’ll burn the kaya if you take your eyes off for a second” are common warnings.
Well, after making kaya from scratch over the weekend, I’m here to tell you that all of that is simply untrue.
Making kaya at home is so fast and easy you’ll wonder why you ever put up with those preservative-laden jars of kaya.
Enjoy and spread the word. Free kaya!
My 15-minute Kaya Recipe
Ingredients
- 5 egg yolks
- 200 ml of coconut milk (this works out to about 4/5 cup of coconut milk, which is a little short of a full cup)
- 150 grams of sugar (this works out to a little over 1/2 cup of sugar)
- 3 drops of pandan essence or 3 pandan leaves, tied into a knot (Note: frozen pandan leaves can be found in most well-stocked Asian markets)
Method
- Separate egg yolks from the whites, making sure not even a tiny bit of egg white remains.
- Combine all ingredients in a medium saucepan.
- Cook over low heat and whisk constantly for 10 minutes or until kaya has the consistency of a thick jam. It’s ready when you can form lines in the kaya with your whisk.
- Let cool and chill in the refrigerator until ready to serve. Store covered in the fridge and consume within a week.